5ire EVM Chain
5ire IDE
Note: In order to start using the 5ire IDE, users must set up and configure their wallet. Head to this section to start setting up your 5ire wallet.
-
Head to the 5ire IDE Platform.
-
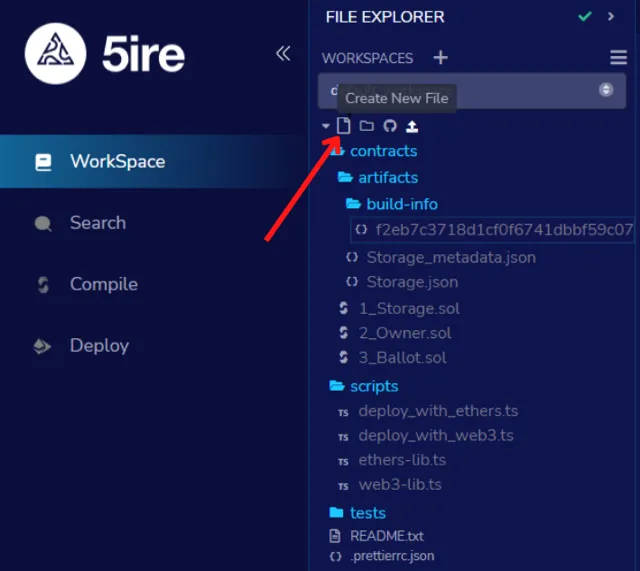
Go to Workspace from the left-panel menu and choose the Create New File icon.
-
Create a new file under contracts folder with the name “5ire.sol”
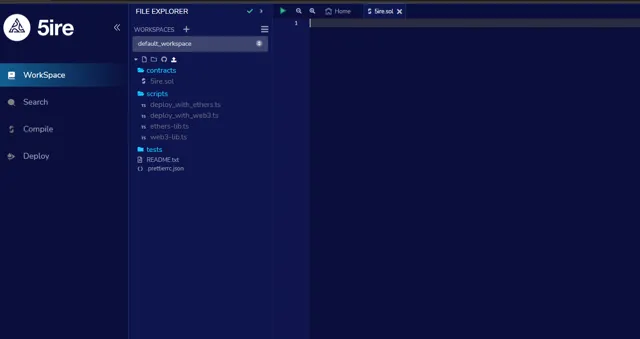
A new file will be generated, and the main panel will appear blank.
-
Writing the code
You can either paste your existing code in the main panel of the 5ire.sol file or upload your contract file in the Workspace.
You could also use the below sample ERC-20 code:
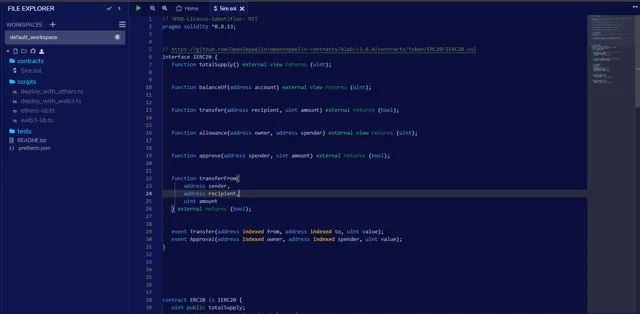
// SPDX-License-Identifier: MITpragma solidity ^0.8.13;// https://github.com/OpenZeppelin/openzeppelin-contracts/blob/v3.0.0/contracts/token/ERC20/IERC20.solinterface IERC20 {function totalSupply() external view returns (uint);function balanceOf(address account) external view returns (uint);function transfer(address recipient, uint amount) external returns (bool);function allowance(address owner, address spender) external view returns (uint);function approve(address spender, uint amount) external returns (bool);function transferFrom(address sender,address recipient,uint amount) external returns (bool);event Transfer(address indexed from, address indexed to, uint value);event Approval(address indexed owner, address indexed spender, uint value);}contract ERC20 is IERC20 {uint public totalSupply;mapping(address => uint) public balanceOf;mapping(address => mapping(address => uint)) public allowance;string public name = "Solidity by Example";string public symbol = "SOLBYEX";uint8 public decimals = 18;function transfer(address recipient, uint amount) external returns (bool) {balanceOf[msg.sender] -= amount;balanceOf[recipient] += amount;emit Transfer(msg.sender, recipient, amount);return true;}function approve(address spender, uint amount) external returns (bool) {allowance[msg.sender][spender] = amount;emit Approval(msg.sender, spender, amount);return true;}function transferFrom(address sender,address recipient,uint amount) external returns (bool) {allowance[sender][msg.sender] -= amount;balanceOf[sender] -= amount;balanceOf[recipient] += amount;emit Transfer(sender, recipient, amount);return true;}function mint(uint amount) external {balanceOf[msg.sender] += amount;totalSupply += amount;emit Transfer(address(0), msg.sender, amount);}function burn(uint amount) external {balanceOf[msg.sender] -= amount;totalSupply -= amount;emit Transfer(msg.sender, address(0), amount);}}This is how your screen will appear after pasting the code mentioned above:
-
Compilation
Go to the Solidity Compiler from the left-panel.
To compile a contract, either select the desired file from the File Explorer, or ensure that the desired file is the active one in the Editor if multiple files are open.
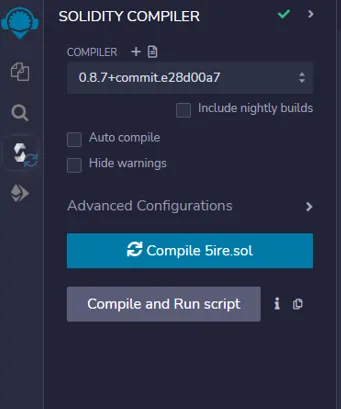
If there is an active file chosen in the file explorer, then the solidity compiler will look like this:
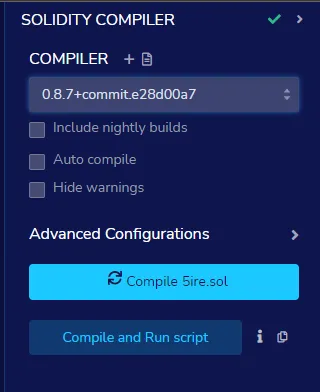
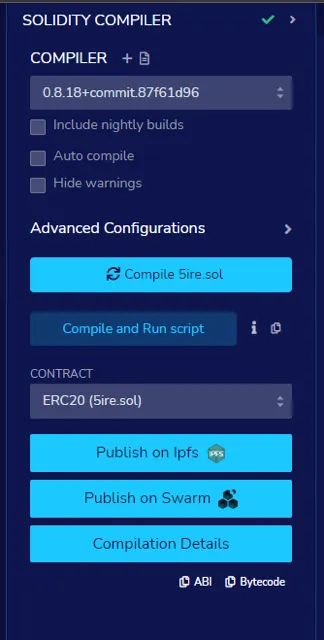
Click on Compile 5ire.sol to compile the contract file.
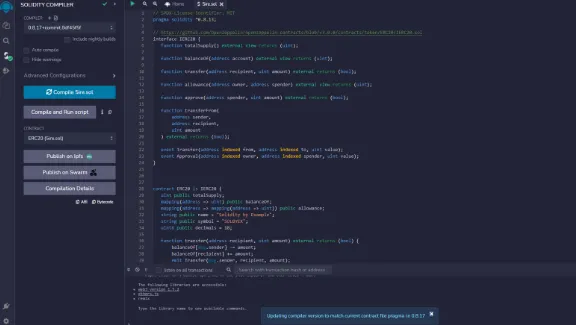
After successful compilation, this is what your screen will look like:
-
Deployment
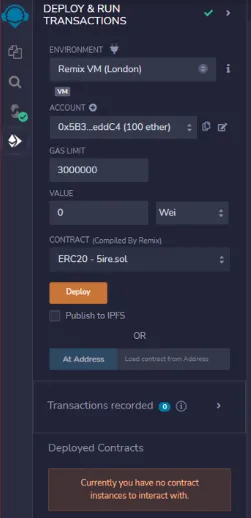
Go to the Deploy & Run Transactions sidebar from the left-panel.
In order to use this module, it is necessary to have a compiled contract. Hence, if there is a contract name in the CONTRACT select box (the select box is under the VALUE input field), you can use this module.
-
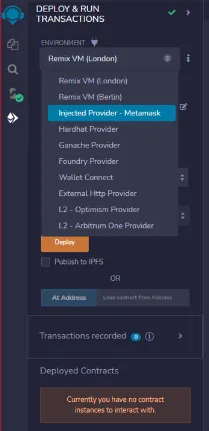
5ire Provider: For connecting 5ire IDE to an injected web3 provider. The most common injected provider is MetaMask and 5ire Wallet extension.
-
Hardhat Provider: For connecting 5ire IDE to a local Hardhat test chain.
-
Ganache Provider: For connecting 5ire IDE to a local Truffle Ganache test chain.
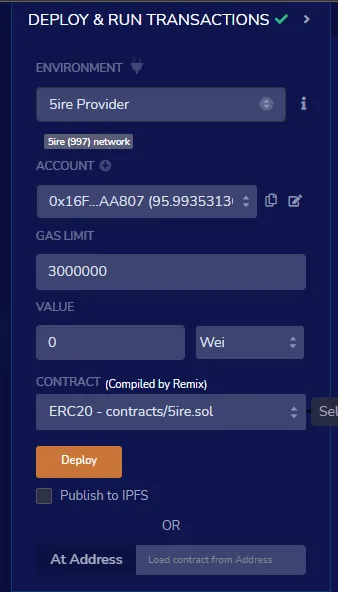
Click on Deploy.
Confirm the transaction on Web3 extension.
Video Tutorial:
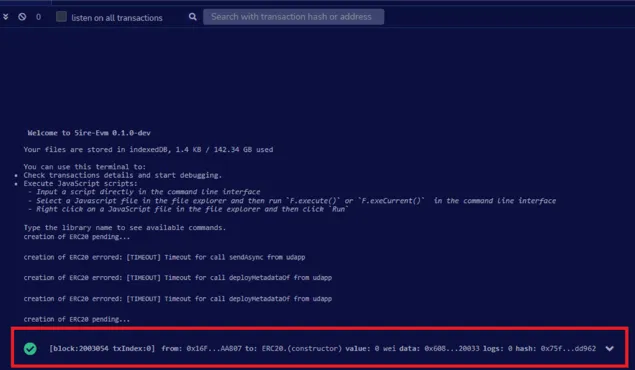
Once the transaction is confirmed, the deployment details, contract address and transaction, will be visible in the terminal:
-
Using Explorer
-
Cloning the 5ireChain node
-
On your system, open a terminal shell.
-
Clone the firechain-evm-base node repository by running the following command:
HTTPS:
https://github.com/5ire-tech/5ire-evm-base.gitSSH:
[email protected]:5ire-tech/5ire-evm-base.git
-
-
Connecting to the node
-
If needed, open up a terminal shell on your local system.
-
Change the root directory where you compiled the 5ire EVM base.
-
Start the node in development mode by running the following command:
Cargo build –release./target/release/firechain-node --dev(it will run the node in development mode.)The —dev command-line option indicates that the node is operating using a predefined development chain specification, which includes a designated EVM account for Alice, along with other accounts specifically set up for testing purposes.
-
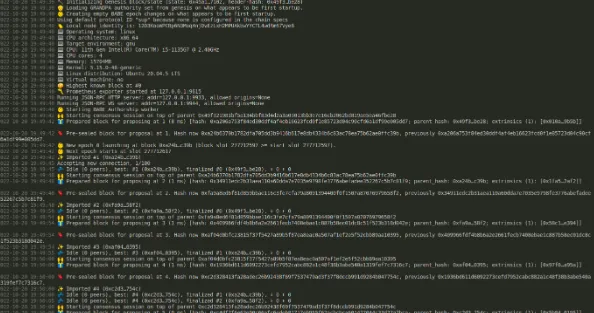
You can verify if your node is up and running successfully after reviewing the output displayed in the terminal.
The terminal should display an output similar to this:

-
Use the Polkadot-JS application to connect to the local node.
-
In the top bar, click on the developer dropdown menu.
-
Create the token contract.
-
Select Extrinsics.
-
For submitting the transaction, select a funded account development account as the account.
-
Select EVM (Ethereum Virtual Machine).
-
Choose the create function.
-
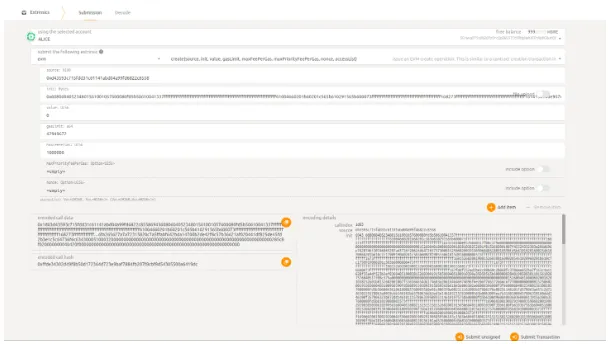
Configure the parameters for the function.
For this Specify this Source 0xd43593c715fdd31c61141abd04a99fd6822c8558 (H160 Address of your Selected Account) Init Enter the token raw bytecode Value 0 Gas Limit 42949672 Max Fee Per Gas 1000000 -
The optional parameters can be left empty. The nonce value will increase the known nonce for the purpose of the source account. This starts from 0x0. Depending primarily on the selected function, you will have to remove unused parameters.
-
Press submit transaction. This will start the process of completing your transaction.
-
To authorize the transaction, click Submit and Sign. This will result in completion of the transaction.
-
Remix IDE
You can deploy a smart contract on the 5ire EVM chain using Remix IDE through the following steps:
-
For initiating the transaction, visit this link.
-
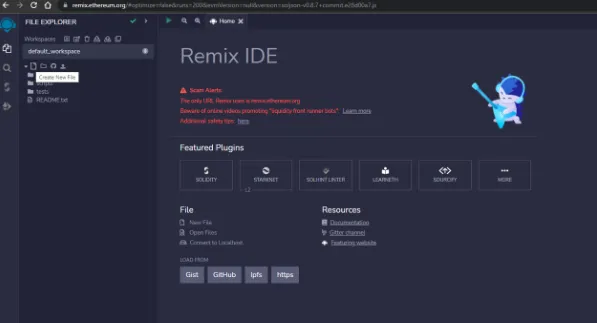
Under workspaces, click on Create New File. This will help you create a new document on which you can start working on deploying a smart contract on the 5ire EVM chain.
-
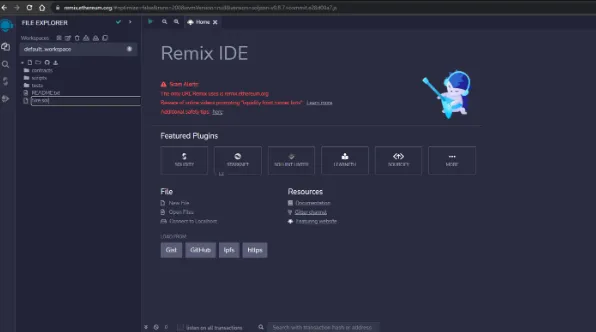
Create a New File under contracts with the name 5ire.sol. This will help you to create a new program through which you can deploy a smart contract on 5ire.
-
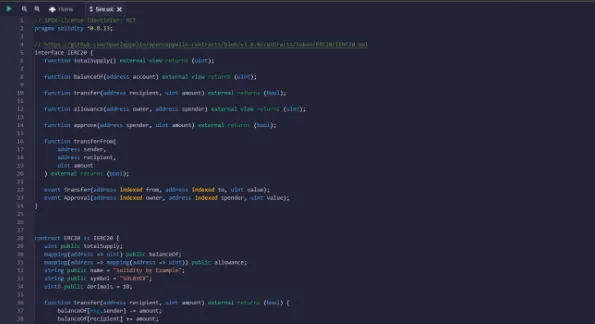
Copy and paste the code given below to the 5ire.sol file.
We have a sample code here for ERC-20 token:
// SPDX-License-Identifier: MITpragma solidity ^0.8.13;// https://github.com/OpenZeppelin/openzeppelin-contracts/blob/v3.0.0/contracts/token/ERC20/IERC20.solinterface IERC20 {function totalSupply() external view returns (uint);function balanceOf(address account) external view returns (uint);function transfer(address recipient, uint amount) external returns (bool);function allowance(address owner, address spender) external view returns (uint);function approve(address spender, uint amount) external returns (bool);function transferFrom(address sender,address recipient,uint amount) external returns (bool);event Transfer(address indexed from, address indexed to, uint value);event Approval(address indexed owner, address indexed spender, uint value);}contract ERC20 is IERC20 {uint public totalSupply;mapping(address => uint) public balanceOf;mapping(address => mapping(address => uint)) public allowance;string public name = "Solidity by Example";string public symbol = "SOLBYEX";uint8 public decimals = 18;function transfer(address recipient, uint amount) external returns (bool) {balanceOf[msg.sender] -= amount;balanceOf[recipient] += amount;emit Transfer(msg.sender, recipient, amount);return true;}function approve(address spender, uint amount) external returns (bool) {allowance[msg.sender][spender] = amount;emit Approval(msg.sender, spender, amount);return true;}function transferFrom(address sender,address recipient,uint amount) external returns (bool) {allowance[sender][msg.sender] -= amount;balanceOf[sender] -= amount;balanceOf[recipient] += amount;emit Transfer(sender, recipient, amount);return true;}function mint(uint amount) external {balanceOf[msg.sender] += amount;totalSupply += amount;emit Transfer(address(0), msg.sender, amount);}function burn(uint amount) external {balanceOf[msg.sender] -= amount;totalSupply -= amount;emit Transfer(msg.sender, address(0), amount);}}This is how your screen will appear after you have inserted the code mentioned above:
-
Click on Solidity Compiler and click on compile 5ire.sol.
-
Click on Deploy & Run Transactions to perform your desired transactions.
-
Deploy the contract 5ire.sol. Select Injected Web3 for deploying to live network. In this case, we have selected MetaMask as the injected provider.
-
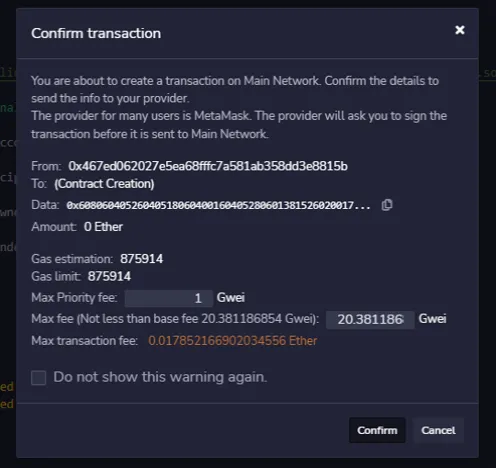
Confirm the transaction after verifying the details. You have to enter the wallet address as well as the amount that will be transferred to the receiving account.
-
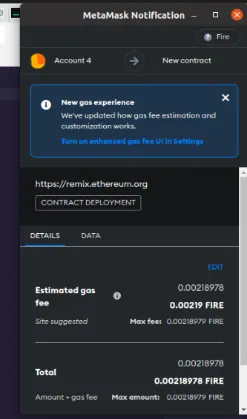
Confirm the gas fee in MetaMask to deploy transactions on the 5ire EVM chain (the gas fee is a small transaction fee which is used for completion of a transaction).
-
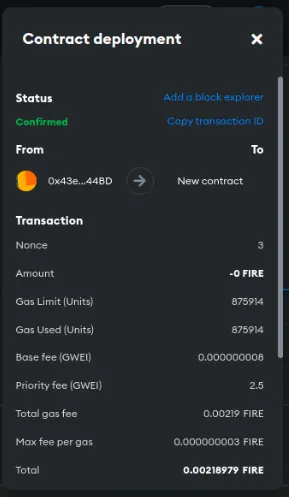
Find the deployed contract address in Remix and update the contract by interacting with integrated functions.
Ganache
Ganache is a private Ethereum blockchain environment that allows you to emulate the Ethereum blockchain to interact with smart contracts in a private blockchain. It can run tests, execute commands, and inspect states while controlling how the chain operates.
Visit this link to download Ganache.
The following guide will walk you through the process of deploying a smart contract using Ganache:
-
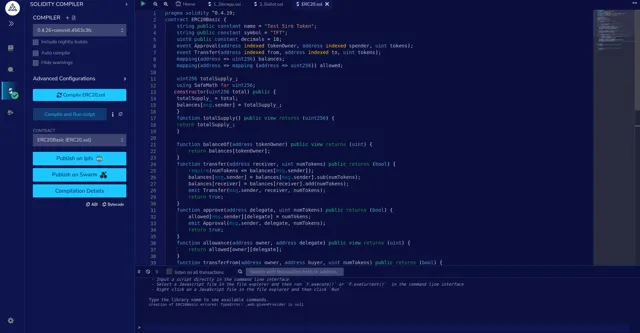
Open Remix IDE in your browser and create a new file under the contract section.
-
Use one of the sample code templates and compile by clicking the Compile button as shown below.

-
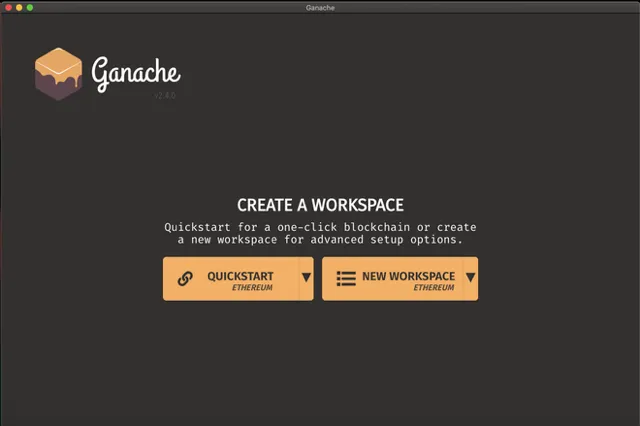
After compilation, open Ganache on your desktop. Your display will resemble the illustration below. Click on QUICKSTART Ethereum.
-
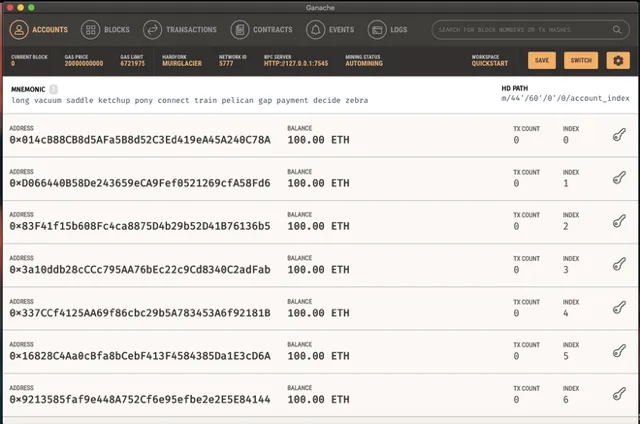
You will now see 10 default accounts, along with a mnemonic for your blockchain at a local RPC server (http://127.0.0.1:7545) as shown below:
-
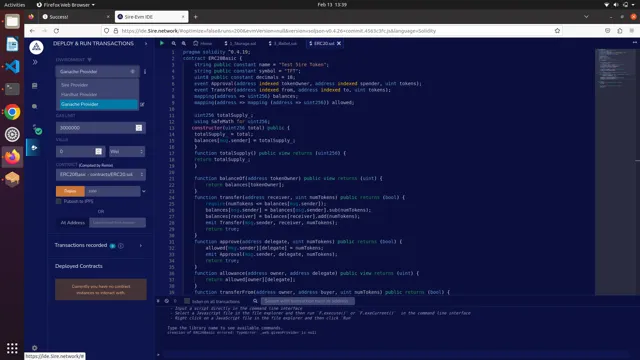
Go back to the browser and move to the Deploy section just below Compile and select Ganache Provider from the environment as shown below:
-
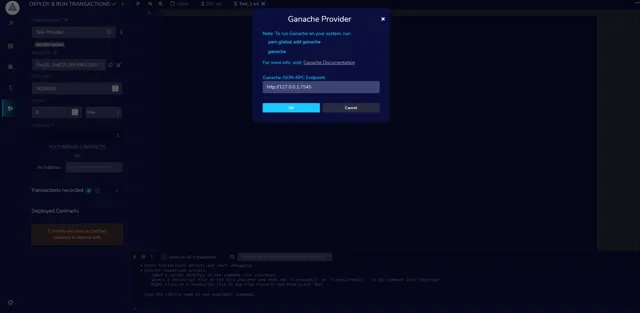
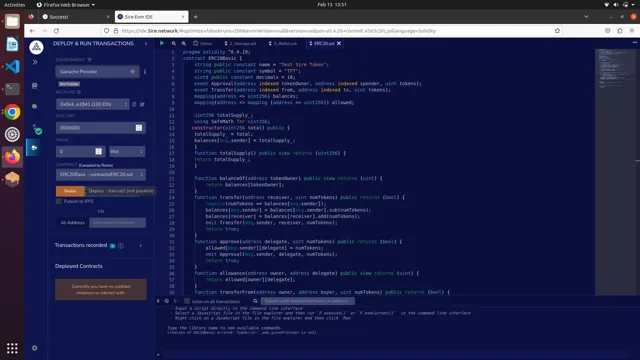
Enter the server http://127.0.0.1:7545 as Ganache Provider. Your screen will look like the image shown below:
-
Your contract is now ready to be deployed! Click on the Deploy button to proceed.
-
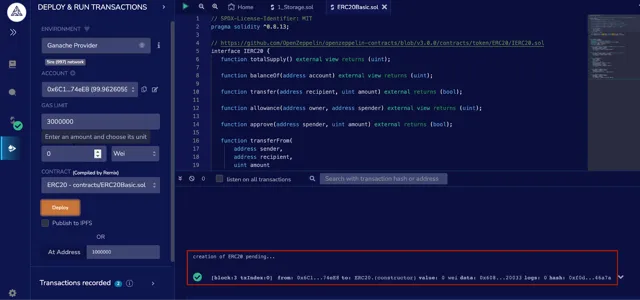
Check the output tab to verify whether your contract has been successfully deployed.
-
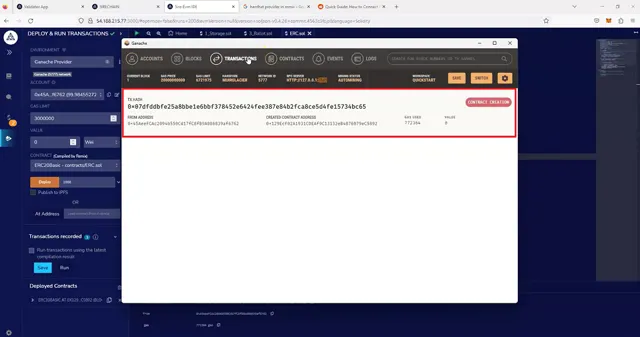
To verify whether your transaction (process) was successfully reflected on the server, open Ganache and move to Transactions. Here you will see the details of your transaction as shown in the image below:
Video Tutorial:
Hardhat
This guide outlines the process for deploying an EVM Smart Contract using Hardhat, which will be carried out on the 5ire EVM IDE.
-
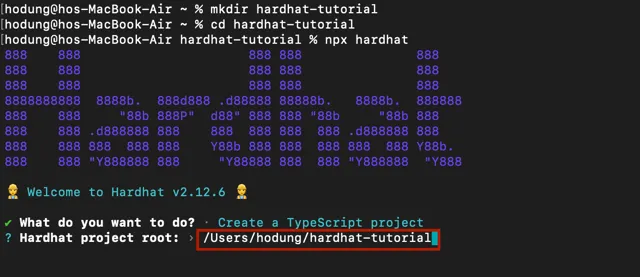
Start by creating a project folder. For this guide, the project folder is titled “mkdir hardhat-tutorial”.

-
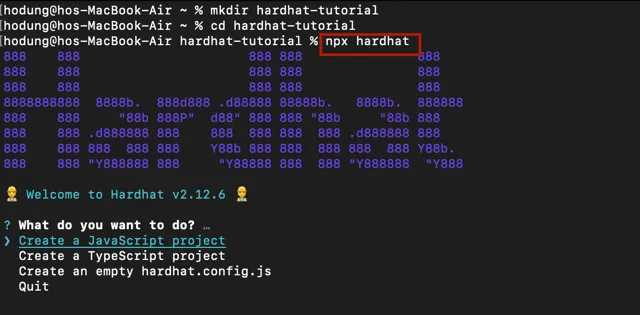
Run the command
npx hardhat. -
The next step is to select Create a Javascript/Typescript project when prompted with the question, “What do you want to do?”
-
Add the hardhat project root created at the start.
-
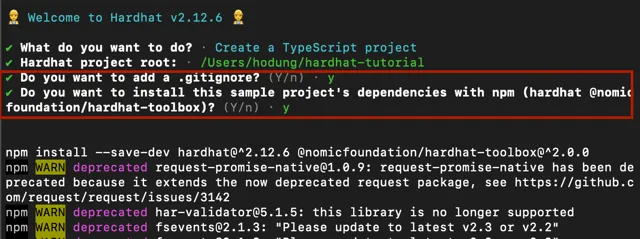
Press “Y” to complete the process.
-
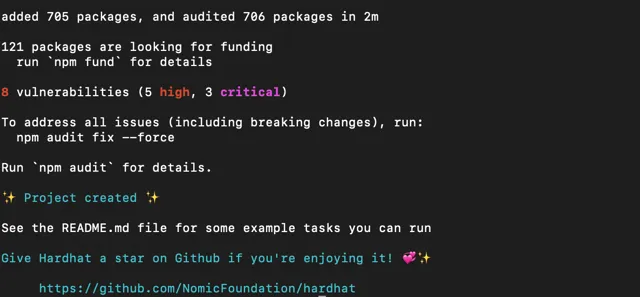
Upon completion of the process, the appearance of your screen will be as depicted in the image below.
-
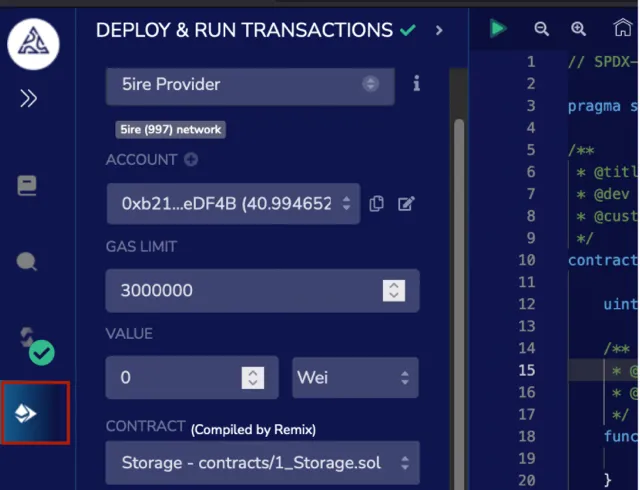
Open Remix IDE and select Deploy and Run Transactions.
-
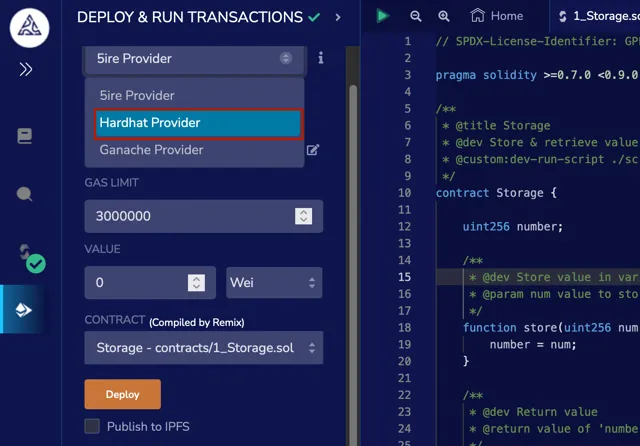
Select Hardhat Provider.
-
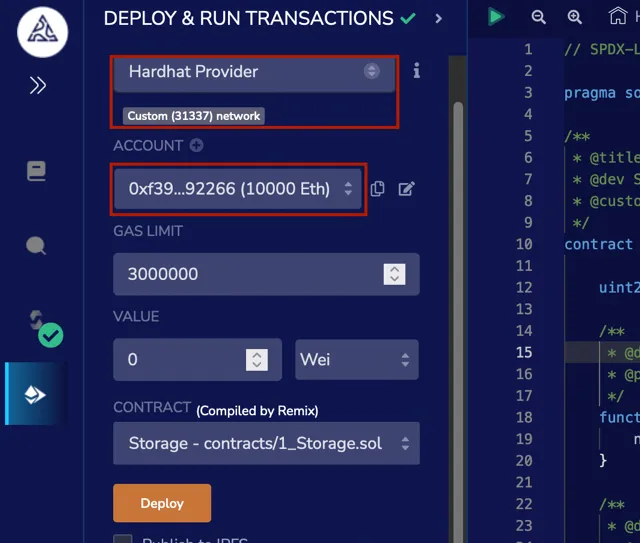
You will see the chain ID and list of accounts if the connection has been established.
-
Run the command
npx hardhat node. It will then display a list of 20 accounts with a balance of 10000 ETH.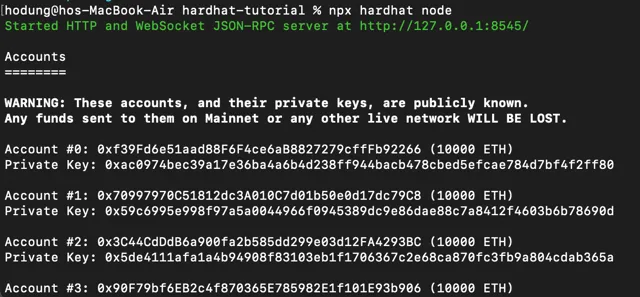
-
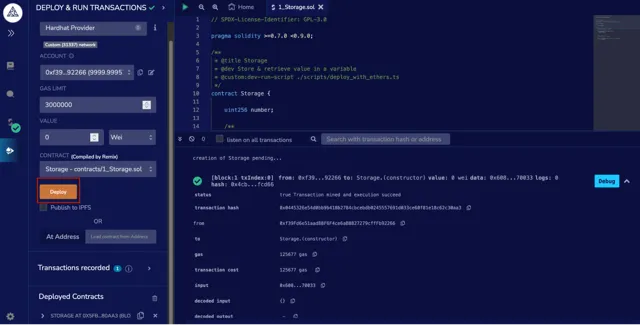
By clicking on Deploy, you can initiate deployment of a specific smart contract, and if all goes well, your transaction will be successful.
-
You can verify the completion of your transaction by checking the terminal.
